Free and Pro. Planet Engine comes in two editions. Every section and every setting in this manual carries a label:
Free means it works in both editions,
Pro means it needs the Pro edition.
Try Pro free for 15 days: no e-mail needed, the server only gets an anonymous code of the computer, and when the trial ends Planet Engine goes back to Free by itself. In the Free edition the Pro features stay in view, with a small padlock and the word
Pro next to their name; see
Licence.
Batch Auto-Optimize Pro: every video of a folder in one go, with automatic RGB composition for mono cameras and a ranked list of the results. It has its own page:
Batch guide.
Contents
Requirements
- Windows 10 and 11: a single program file, PlanetEngine.exe, nothing to install.
- Windows 7: a separate version, built on .NET Framework 4.8, which must be installed on the computer. On Windows 7 the window is drawn without hardware acceleration, so it opens more slowly. Graphics card computing (Pro) is not guaranteed on Windows 7; on the processor the result is identical.
- For the graphics card computing of the Pro edition: an NVIDIA card with CUDA, or an Intel or AMD card with OpenCL. Without one, everything runs on the processor (see Computing).
- An internet connection is needed only to activate Pro or start the trial (see Licence).
The Free and Pro editions will be available soon (Coming soon): this manual describes the program as it will be published.
First Steps
Free
- Open a video. Press Load a video or an image at the top of the first column, drop the file on the window, or click the empty viewer (or press Ctrl+O) to choose it. Opening a video does not start any work: scroll through the frames and decide whether it is worth stacking. SER and uncompressed AVI, mono or colour. MOV, MP4 and compressed AVI need ffmpeg.exe and ffprobe.exe next to PlanetEngine.exe (or in the PATH). Drop three or four files at once (R, G, B, and optionally L) for a colour composite: Planet Engine guesses the channel from the file name, and you can correct it from the list that appears.
- Analyse the quality. Press Analyse selection, under Load a video or an image: Planet Engine reads the frames of the From/To range (fast even on a long capture; Analyse all reads the whole video), finds the planet (or recognises a lunar or solar surface) and scores the sharpness of every frame. The bar at the bottom shows the progress; then the quality chart appears. This step is optional: stacking measures the quality anyway.
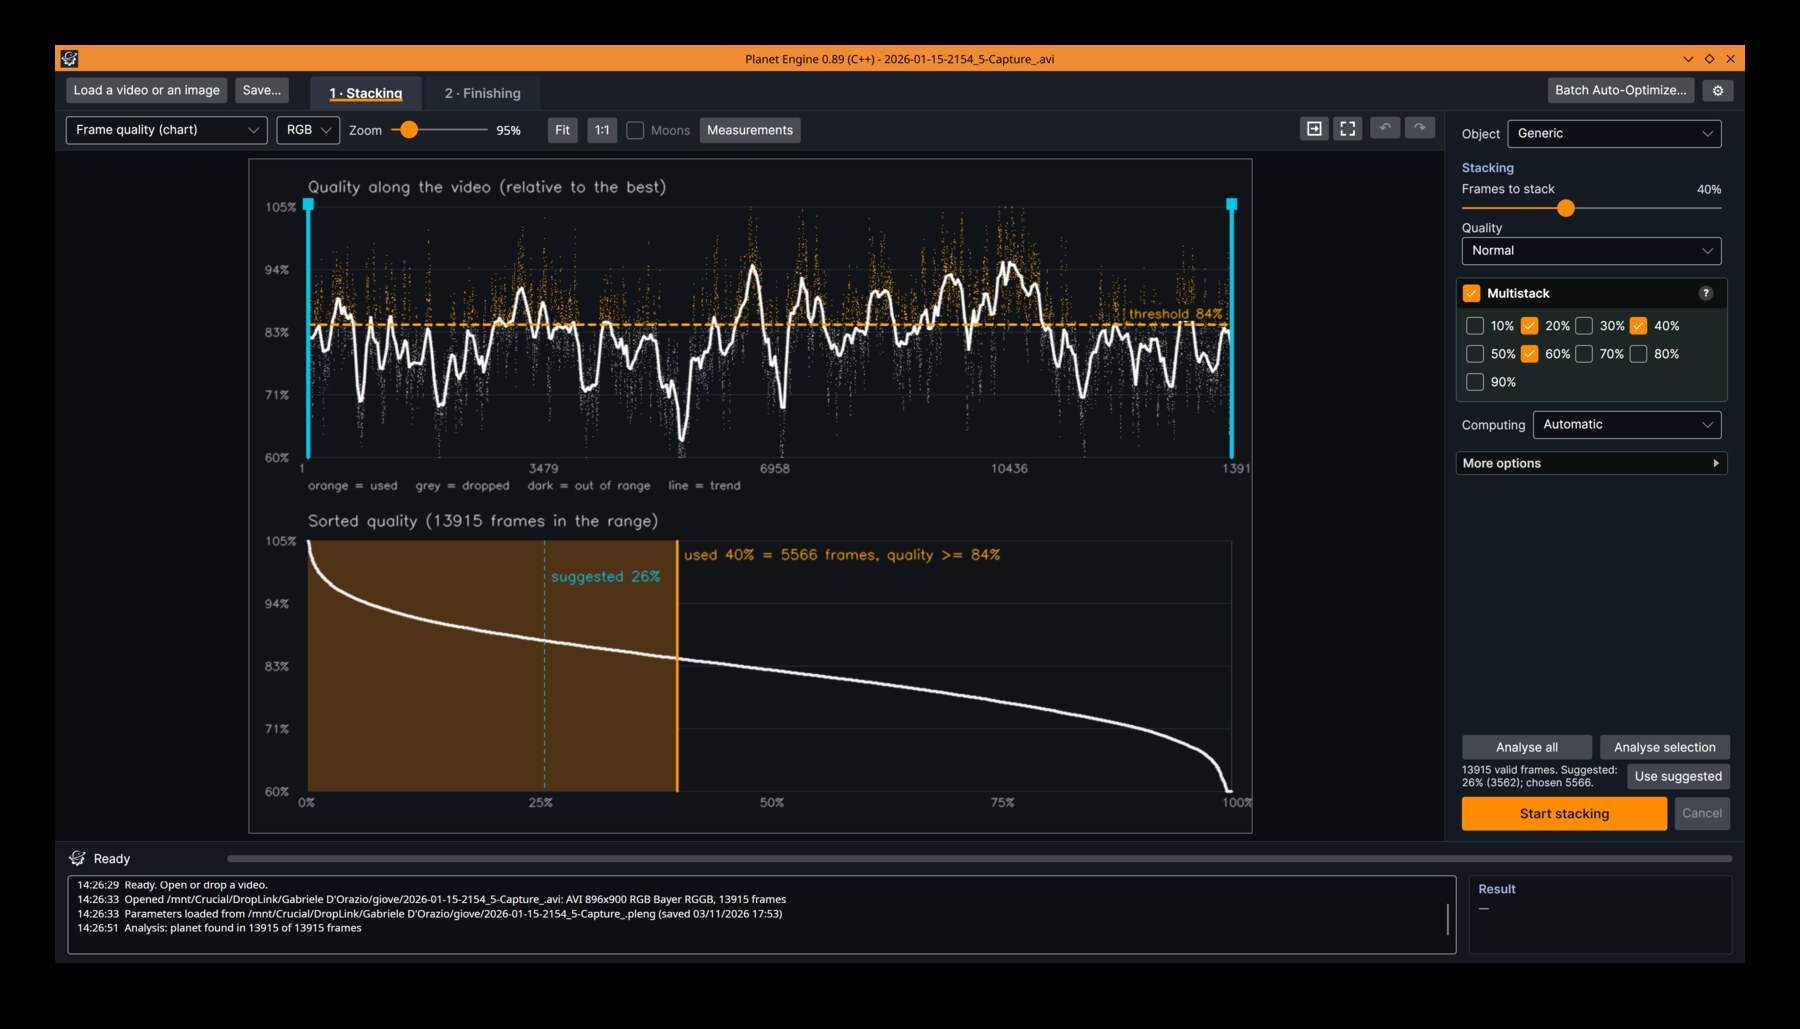
- Look at the chart and choose the frames. Narrow the range with From frame / To frame if part of the video is bad (clouds, a bump, the planet drifting out), then choose Frames to stack (50% by default), or press Use suggested. In the chart you can also drag the lines with the mouse: the orange line is the same thing as the Frames to stack slider, the cyan lines set the range.
- Start stacking. Press Start stacking, under the two analysis buttons. It takes from a few seconds to a few minutes, depending on how many frames you use. Cancel stops it. While it works there is a single bar, Alignment and stacking, from 0 to 100 (if you did not analyse first, the analysis is included); at the end the log writes Stacking: N frames, quality X, done in Y s. When it ends, the Result box at the bottom right also shows the measured resolution of the stack (see Stacking).
- Sharpen and grade. The view switches to Stack + sharpening. Sharpening is in the column left of the image, colour, tone and curves in the column on its right: the image updates live, without stacking again.
- Save. At the bottom right, next to the log: Save stack… for the 16-bit TIFF to process elsewhere, Save image… for what you see (PNG, TIFF or JPG), and Save parameters to find everything again next time.
Load a video or an image, Analyse all and Save image… are highlighted in the accent colour of the interface. That colour follows Windows, or choose it from the ⚙ menu at the top right of the window: Windows colour, Orange, Blue, Green, Red (night), which does not dazzle eyes adapted to the dark, or Custom… (R, G and B sliders with their numbers, and a hex code). Only the accents change (sliders, check boxes, the highlighted step buttons); the rest stays dark grey. The choice is remembered.
Already stacked images. With the same button, or by dropping it on the window, you can also open an image that is already stacked: TIFF, PNG or FITS at 16 bit, 32 bit or floating point, made with Planet Engine or with other programs such as AutoStakkert or Siril. Stacking is skipped and you go straight to the finishing: all the detail sliders, noise reduction, colour and curves (deconvolution and Wiener in Pro). The stacking controls are disabled and the first column says Already stacked image: finishing only (sharpening and colour). Under it, Align RGB channels Pro moves red and blue onto green to remove the coloured edges of atmospheric dispersion, and writes the shift in pixels in the log; press it again to get the image back as it was. Useful for re-processing old stacks when the SER or AVI files are gone.
The Views
Free
The menu at the top left of the viewer chooses what to show. Zoom, Fit and 1:1 change the size; the mouse wheel zooms in steps that always stop at 100%, keeping the point under the cursor still. Hold the right button to move around an enlarged image. Sharp pixels shows the pixels without smoothing when you zoom in; Adjustments, at the top right next to undo and redo, hides or shows all the columns, the first one included, to give the image all the room; it always stays in the same place, so you can turn it back on without looking for it. Measurements opens the floating measurements panel (see Measurements). Next to the view menu, a second small menu shows a single channel in black and white, R, G, B or L (luminance), to judge the noise or the sharpness of one channel; it changes only the view, not the saved files. The arrow buttons ⟲ and ⟳ turn the image by 90°, ⇆ mirrors it (left and right swapped), ⇅ flips it (top and bottom swapped), and the angle box turns it by any angle, in degrees clockwise; the two ▲ arrows beside it raise the left or the right edge by half a degree (this resamples the image and softens the finest detail slightly). The orientation applies to the finished views, to Save image… and Save stack…, is kept in Save parameters and is not part of the presets. ↶ and ↷ undo and redo the last changes to the settings (Ctrl+Z, Ctrl+Y; the keys can be changed in the ⚙ menu). At the right end of the bar, the ⚙ button opens the language, the interface colour, the telescope data, the computing choice and the licence (see The ⚙ menu). On a narrow screen the bar wraps; while Planet Engine is working, the progress shows at the top right over the image, without moving anything.
- Stack + sharpening: the result, with the sharpening applied.
- Stack: the result before any sharpening, the same data saved in the TIFF.
- Channel L, R, G, B (aligned stack): in a colour composite, each aligned channel on its own.
- Best frame: the single sharpest frame, to see how much the stacking gained.
- Frame quality (chart): top, the quality along the video (orange = used, grey = dropped, dark = out of range, white line = trend). The dashed line threshold NN% is the same minimum quality as the sorted chart below: frames above it are used, frames below it dropped; it moves with Frames to stack and with the orange line. Bottom, the same qualities sorted from best to worst, with your choice and the suggested one.
- Original video (frames): the frames of the video, with a slider to scroll through them. The detected disk is drawn in green, in red when it touches the edge of the frame (Detected disk turns the circle off). A thin grey frame marks the edge of the video frame, so a dark video on the dark background still shows where the field ends. The line under the image tells the quality of the frame and whether it is (or would be) used.
- 20% / 40% / 60%… Pro: after a Multistack, one button for each percentage. One click switches to that stack, with the same settings, the same view and the same zoom.
- Moons Free: after stacking, this switch circles and numbers the moons found in the stack. On screen only: saved files stay clean.
Preview box. On large images, like the Moon, every change would redo all the sharpening. Drag a rectangle with the left button on the finished image: while it is there, changes are computed only inside it, over the last whole image, and when you release the mouse the new area is processed at once. A click on the image or Esc removes it and everything is redone with the current values; Save image… always computes the whole image.
Frame Selection
Free
From frame / To frame Free
The part of the video to use. Leave out clouds, bumps of the mount, or the end of a long video in which a planet has rotated too much.
Analyse selection / Analyse all / Use suggested Free
Analyse selection and Analyse all, at the top of the first column under Load a video or an image, score every frame and draw the chart. The suggestion starts from the "knee" of the sorted quality curve, the point after which frames get clearly worse, and multiplies it by 2.5: more frames lower the noise more than they soften. It is always between 20% and 60%. Good as a starting point; then try a little more or less and compare. In the chart, drag the orange line to change Frames to stack and the two cyan bars to change the range. Analyse selection reads only the frames of the range, so on a long capture you can set it roughly and analyse just that part; Analyse all reads the whole capture, to look for the best stretch on the curve (the parts not analysed stay grey). Under the sliders Planet Engine shows how long the range lasts (from the time stamp of every frame in SER files) and, for Jupiter, Saturn and Mars, how many pixels the rotation of the planet moves a detail at the centre of the disk: above 2 px the line turns orange and a shorter range is better.
Stacking
Free Pro: the items marked Pro
In the first column, under the frame selection. These settings need a new stacking to take effect; with an already stacked image they are disabled.
Target default: Automatic Free Pro: Sun
Planet: a disk on a black sky; it is found in every frame; tick Crop around the subject to crop the work area around it. Surface (Moon, Sun): a close-up that fills the field; the whole frame is used and its drift is followed. Automatic decides from the first frame; force it if it gets it wrong (for example a crescent Moon with a lot of black sky). Sun stacks like a surface and then opens the solar tools of the Sun mode; in the Free edition it shows Sun (Pro), and a solar video is stacked and finished as a surface.
Frames to stack default: 50% Free
The share of the best frames, within the range, that goes into the stack: the same thing as the orange line in the quality chart. More frames = less noise but more blurred frames. Planet Engine’s advanced stacking tolerates more frames than a classic stack. Measured at equal grain on two Jupiter videos and one Saturn video, 50–70% of the frames gave 8–12% more structure than 35% (the previous default); Saturn gained nothing beyond 50%. Stacking takes about 40% longer than at 35%. With poor seeing try less and compare. The reference is taken from the best frames in the middle third of the range, so that the planet’s rotation smears the detail less.
Reference (best frames) default: 3% Free
The share of the very best frames stacked to make the first reference, the image the frames are stacked against (at least 20 frames). Raise it with noisy videos, lower it if only a few frames are really sharp.
Quality default: Normal Free
Normal, High, Maximum or Extreme: higher quality gives more detail and takes more time. Normal is a good balance; try High or Maximum on your best videos, and compare. It is saved with the parameters.
Stack upscaling default: 1.0x Free
1.5x or 2x: the frames are accumulated on a finer grid, so their sub-pixel offsets add real resolution (like a drizzle or the resample of other stackers). The result goes back to the original scale before sharpening, so the image keeps its size. Useful for undersampled videos (a small planet on few pixels); slower and with more memory.
Multistack default: off Pro
Several stacks of the same video with different percentages of frames, all with the same settings, to see which works best. Tick the box under Stack upscaling, tick the percentages (10 to 90%; 20, 40, 60 and 80% to start with) and press Start stacking: at the end the toolbar has one button per percentage. With few frames the fine detail is at its best but the grain shows more; going up the grain drops, but the detail softens and the halo around the planet grows. The right point depends on that night’s seeing. It all runs in one go: it takes about as long as the stack of the highest percentage, and the results are the same as stacks made one by one (on a Saturn, 30, 50 and 70% in 79 s instead of 178 s). Save image… and Save stack… save the chosen one, with the number of frames in the name; Save all…, after the percentage buttons, saves the stack and the processed image of the percentages you choose, in a folder.
Local selection default: automatic Free
More detail on Jupiter and Mars, with a little more grain; on smooth Saturn it only adds noise. Automatic turns it off when the subject has rings and keeps it on otherwise (Moon and Sun included); On and Off force it. The Result box says what was used.
Crop around the subject default: off Free Pro: moons one by one
Off, Planet Engine works on the whole frame, as captured. On, it crops the work area around the planet, moons included: faster. In the Pro edition the moons in the field are aligned one by one.
Align RGB channels default: on Free
Corrects the shift between red, green and blue caused by atmospheric dispersion, which gives coloured fringes at the top and bottom of a low planet. Turn it off only if you used an ADC that already removed it. (The Align RGB channels button for an image that is already stacked is a Pro feature: see First steps.)
White balance default: on Free
Removes the colour of the sky background and makes the planet neutral on average. Then refine with the R, G and B curves. Turn it off for objects that are not neutral, or if you want to balance the colour yourself. With the Sun target it is turned off by itself, and put back as it was when you choose another target.
Derotation default: off, experimental Pro
Compensates the rotation of Jupiter and Saturn, so that the detail of a long video does not smear. It uses the times in the SER (or the frame rate of an AVI) and recognises the planet from the name of the file or of its folder; when it does not help, it stays off. The Result box says whether it was used, and if not, why.
Defaults Free
At the bottom of the column: puts back only the stacking settings to the starting values. The From/To range is kept.
Result: resolution and signal Free
After every stacking the Result box, at the bottom right, shows the measured resolution in pixels and signal to … px: down to which size there is real detail rather than noise. A smaller number means finer real detail; use it to compare settings on the same video. The same values are written to NAME_info.json (resolution_px, signal_limit_px) and printed by the command-line tool.
Sharpening
Free Pro: deconvolution and Wiener
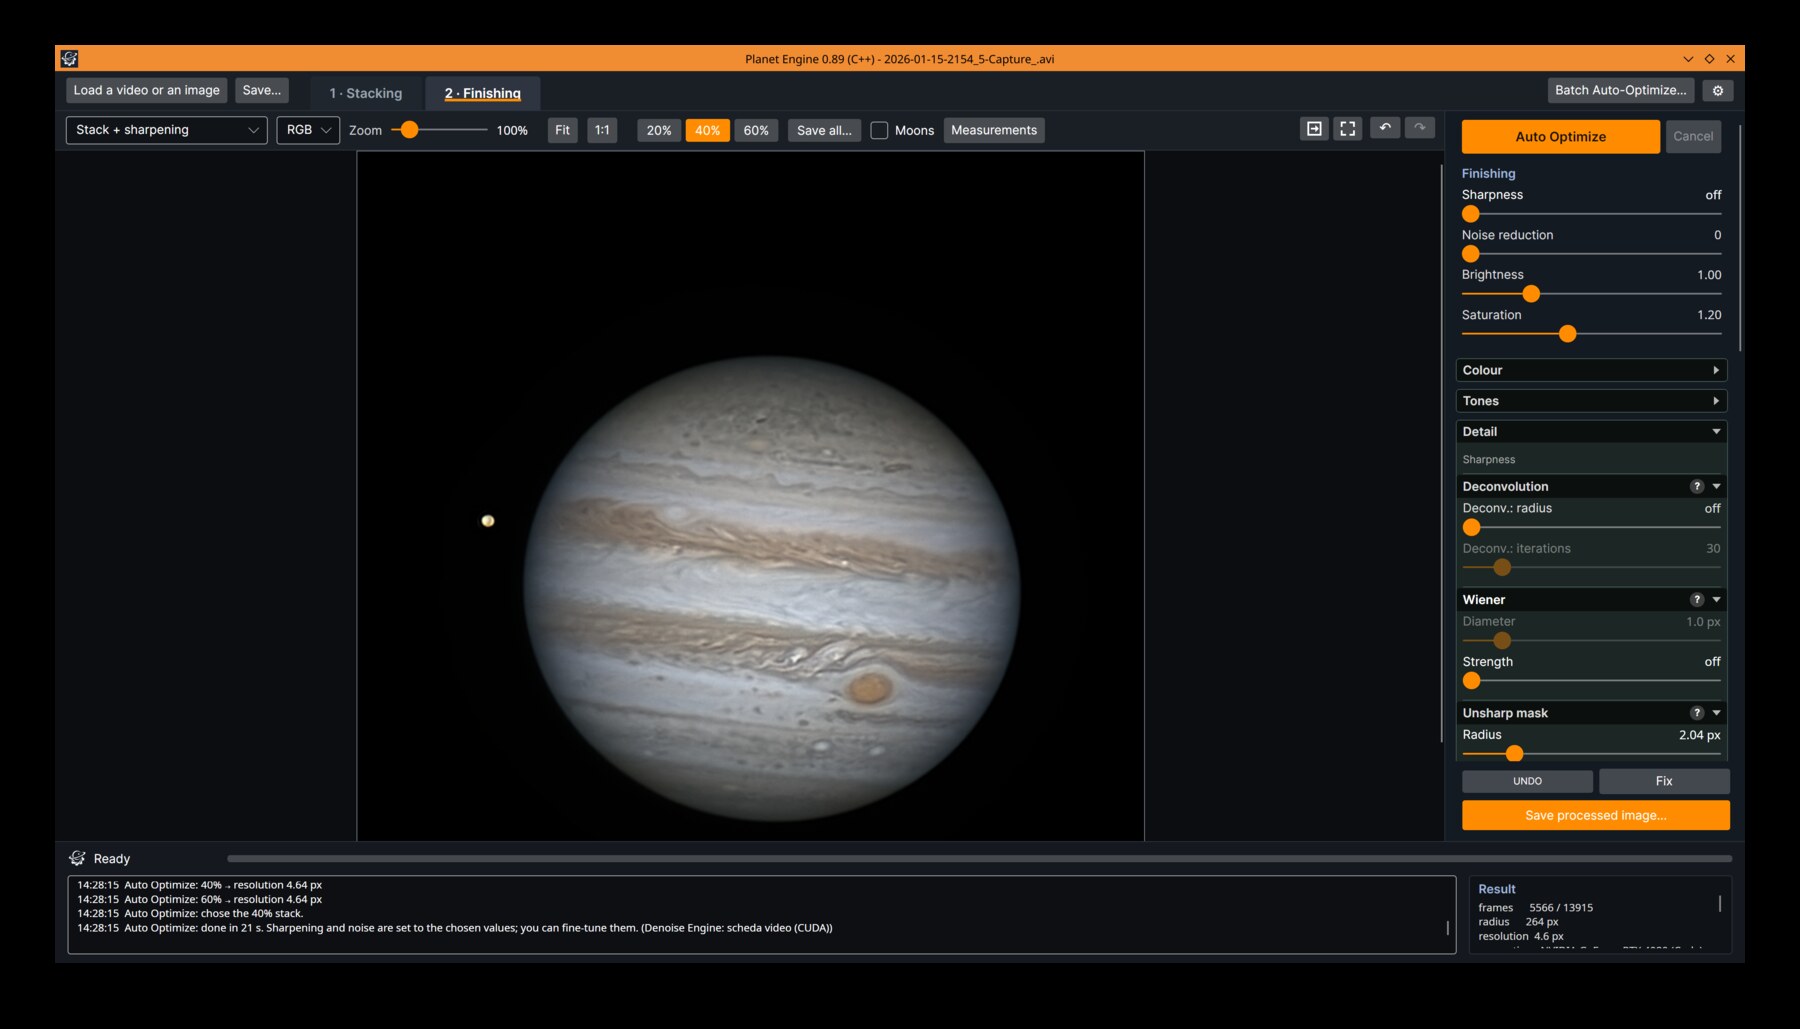
These sliders, in the column left of the image (Sharpening (live), under the presets), act live on the finished stack: no need to stack again. The order of the operations is: deconvolution and Wiener, then wavelets, then unsharp mask, then colour and tone, then curves. When Planet Engine starts, all the sharpening is at zero, so the first stack shows as it came out; a saved .tarastack file or a preset brings your settings back. The sliders come in groups: Deconvolution (with Wiener), Detail, Unsharp mask and Noise. In Sun mode the whole column works on the zone chosen in Adjust:.
Switching a setting off to see what it does. A plain click on a slider’s knob, without dragging, switches that setting off: the slider turns grey, off shows next to the value, and the value stays where it was. Another click turns it back on; dragging it turns it on and moves it. The W key switches the last touched slider off and on, so you can compare without taking your eyes off the planet. In filters with two sliders (deconvolution, unsharp mask, noise reduction) the whole filter goes off. It applies to the preview and to saved images; parameters and presets keep the real value.
A good routine: start from zero; set Detail scale until the bands are well drawn; add deconvolution gently (Pro); raise Fine detail only as long as the noise stays acceptable; then saturation and midtones. Zoom to 1:1 to judge.
Deconvolution: radius default: off Pro
Richardson-Lucy deconvolution: it "undoes" a blur of the given radius (in pixels). Typical values 0.8–1.5 px. Too large and dark or bright rings appear around edges and the noise grows. It works best on stacks with many frames.
Deconvolution: iterations default: 30 Pro
How strong the deconvolution is. More iterations = more detail, but also more noise and ringing. 30–80 is a good range; with many frames and a clean signal you can go up to 200 to see how far the image holds.
Wiener: diameter and strength default: 5 px, strength 0 (off) Pro
A one-pass Wiener deconvolution: a quick sharpening with just two sliders. Diameter (0–8 px) is the size of the blur to remove, Strength (0–1) how much of it to remove; at strength 0 it is off. It boosts the detail only as far as the stack has real signal and leaves the finer noise as it is, so it stops by itself where the stack runs out of detail.
Two ways to use it. On its own, strong (for example 5.7 / 0.9, plus a little Soften): on a Jupiter test it gave 85–90% of the detail of a carefully tuned wavelet + deconvolution + unsharp mask recipe, with less grain and three settings instead of eight. As a base, light (for example 3 / 0.3), under the detail sliders. At the same grain, well-tuned wavelets still give a little more fine detail: Wiener is the quick road, not a replacement.
Detail scale default: 0.7 px Free
Not a strength but a size: the size in pixels of the finest wavelet layer (0.7 px by default, from 0.5 to 2 px). The other layers follow at twice, four and eight times that size: with 0.7 they work at about 0.7, 1.4, 2.8 and 5.6 px. So it moves all the detail sliders together: at 1.5 they work at 1.5, 3, 6 and 12 px; at the maximum of 2, at 2, 4, 8 and 16 px. Raise it for oversampled videos (long focal ratio) or soft stacks, so that Fine detail sharpens real detail and not noise; keep it low for sharp, well sampled videos. First choose the scale (the size you work at), then the detail sliders (how much each layer is pushed).
Fine detail / Medium-fine / Medium detail / Large-scale contrast / Structures default: 10 / 0 / 10 / 1.25 / 5 Free
How much each wavelet layer is strengthened. 0 leaves that layer as it is. Fine detail sharpens the smallest features but also the noise; Medium detail is the most useful for festoons, spots and the Cassini division; Structures brings out belts and zones; Large-scale contrast acts on the whole disk, a little goes a long way. Medium-fine gives an extra boost to the finer half of the medium layer, between fine and medium detail (about 1 px at the default detail scale of 0.7 px): it adds structure with less grain than pushing Fine detail; at 0 nothing changes. All of them go from 0 to 100; for Structures, at the end of the group, the scale is five times finer, because beyond that it ruins the image. With the mouse the slider is finer at the low end, so small values stay precise; the arrow keys move it by 0.1, with Shift by 1.
To work finer than Fine detail, lower Detail scale (down to 0.5 px) and raise Fine detail: there is no separate slider.
Unsharp mask: radius and amount default: 1.5 px, amount 0 (off) Free
A classic unsharp mask, applied after the other filters, for those used to it from other programs. Radius goes from 0.5 to 10 px, Amount from 0 to 100, with the slider finer at the low end. With the amount at 0 it is off and the radius slider is faded.
Noise reduction default: 13 Free
In the Noise group. Cleans every wavelet layer of the variations smaller than the noise level measured in that layer, before strengthening it. It is a soft threshold judged on the neighbouring pixels and on the three channels together, so it works the same on bright and dark areas: no isolated or coloured dots left in bright clouds or rings. It goes from 0 to 200; 0 = off. With the arrow keys it moves in steps of 1. Raise it if the sky or the disk become grainy. Too much flattens faint details: if fine detail disappears, lower it. Settings files and presets from older versions are converted automatically (the old 0.4 reads as 13).
Noise reduction scale default: 2 Free
Up to which detail size the noise reduction acts, shown as ≤ N px. It goes from 0.5 to 4 in steps of 0.1: for example 1.5 cleans the finest layer fully and the next one by half. The default 2 reaches ≤ 1.4 px at a detail scale of 0.7 px.
Soften default: 0 (off) Free
In the Noise group, up to 1.5 px: a light blur after the unsharp mask that removes the finest grain. It is the last step of a common recipe: fine detail and a fine unsharp mask, then a minimal blur (like Photoshop’s Blur).
Luminance only default: off Free
When on, deconvolution and wavelets work on the brightness, and the colour comes from the stack: no coloured edges and no colour noise. Turn it on if colour fringes or colour noise appear; when off, each channel is sharpened separately.
Protect the limb default: off Free
When on, the edge of the planet stays almost as sharp as without protection, but with no bright rim and no dark ring. On the sky, the glow of the limb is darkened down to the sky background, so no grey veil is left around the planet. Turn it on if a bright rim or a dark ring shows on the limb after sharpening. Moons and stars in the field are not treated as sky: they stay as bright as without protection. Not used on lunar and solar surfaces. For the saw-tooth that strong filters leave along the edge, see Smooth limb.
Reset to zero Free
At the bottom of the column: sets only this column to zero (detail, deconvolution, noise reduction and unsharp mask). The other columns are not touched.
Colour, Tone and Curves
Free Pro: Tint, Sharpness, Smooth limb
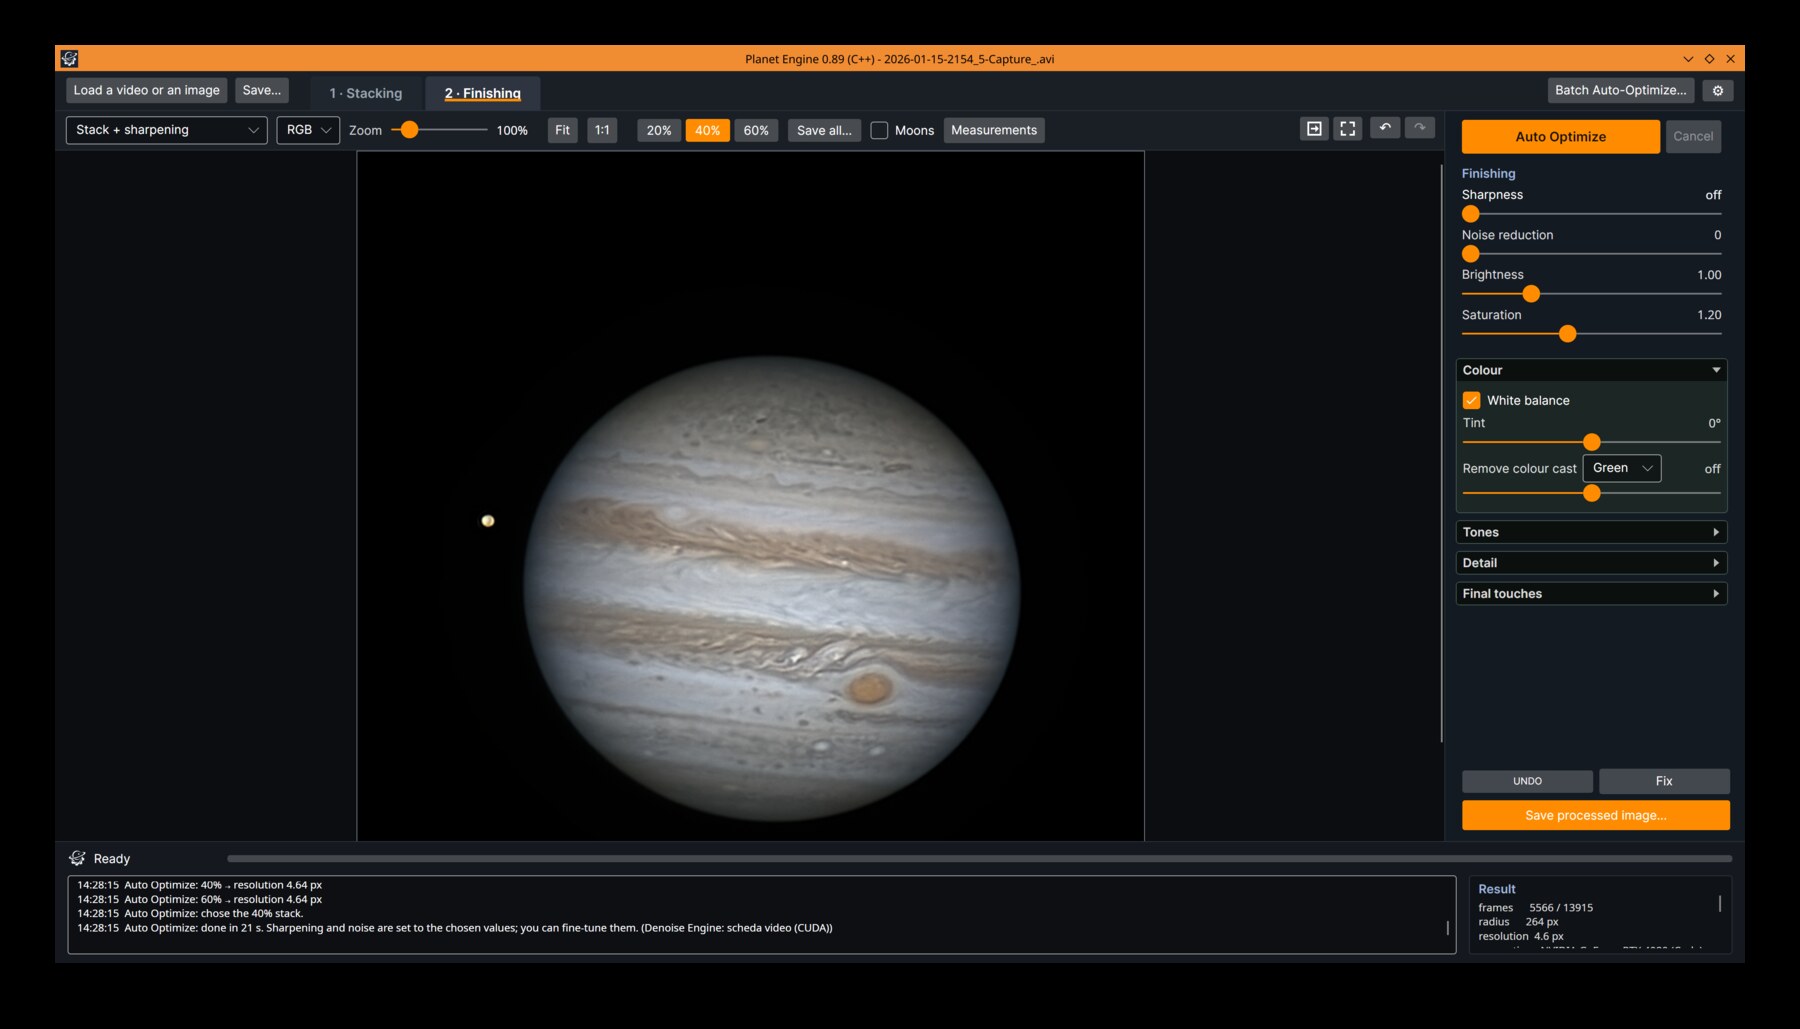
The third column, right of the image (Colour and tone (live)): normalisation, saturation, midtones, contrast, the final touches, colour blur, curves and histogram. Also live. Noise reduction is in the sharpening column. With the Sun target the solar tools appear at the top of this column (see Sun mode).
The brightest details are never clipped: above 85% a soft shoulder compresses the highlights, keeping their hue, so bright zones and rings do not burn to white. This applies to the finished views and the saved images, not to the 16-bit stack TIFF.
Normalise default: off Free
When on, the black goes to zero and the brightest point to the chosen percentage (50–100%); this also applies to Save stack…. When off, the stack keeps the brightness of the capture.
Saturation default: 1.2 Free
Colour intensity: 1 leaves it as stacked, 0 is black and white.
Midtones (gamma) default: 1.0 Free
Above 1 brightens the midtones (shows more on a dark limb or on the rings), below 1 darkens them and increases the contrast. Colours are not changed.
Contrast default: 0 Free
The overall contrast, from −100 (flat) through 0 (as it is) to +100 (strong). It is an S curve around the middle grey of the subject (the median of the light above 10%, so the black sky does not count and a bright solar disk is not flattened): black, middle grey and white stay in place, the curve gets steeper or flatter around the middle. It does not burn the highlights or close the shadows, and the whole pixel is scaled, so the hue stays.
Blur colour default: 0 (off) Free
Blurs only the colour (a and b of Lab), up to 6 px: luminance and detail stay. It removes the colour noise, like a blurred layer in colour blend mode in Photoshop, and works in both RGB and Lab mode.
Reset to zero Free
At the bottom of the column: only this column goes back to neutral: saturation 1, midtones 1, normalisation and colour blur off. The curves have their own reset buttons (below).
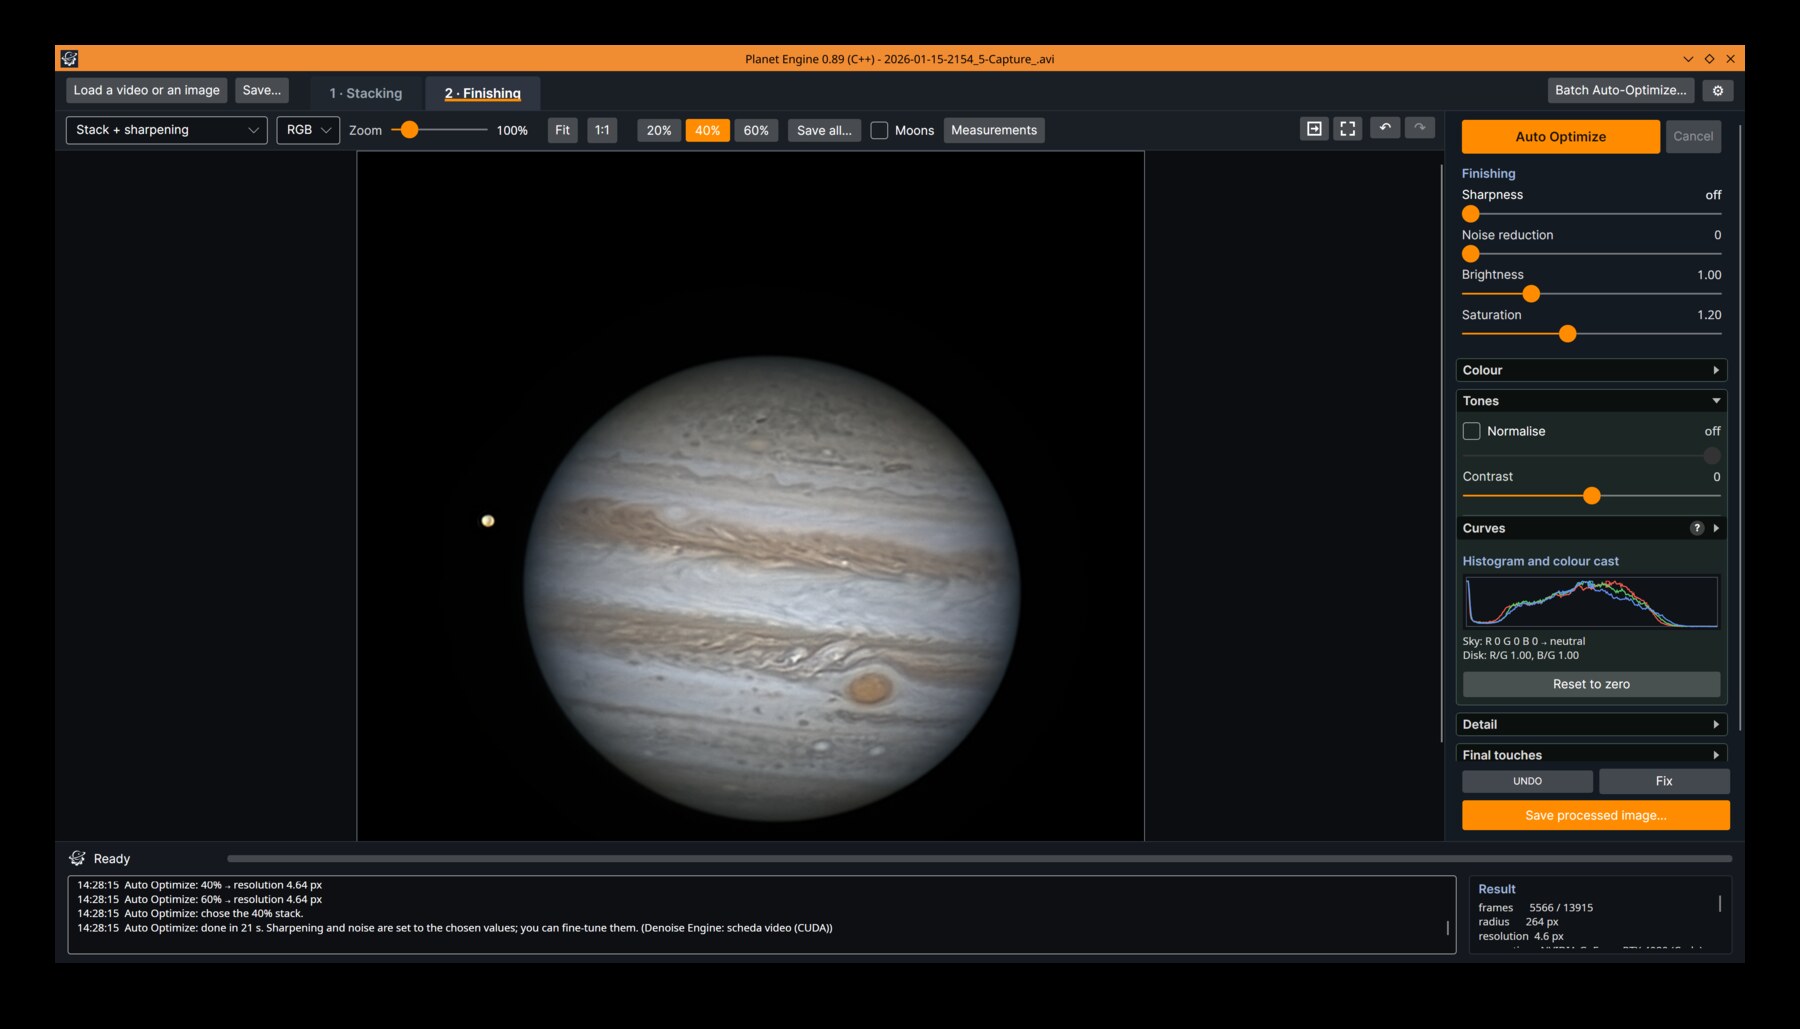
The curves panel: Lab mode, L curve with one extra point, the histogram behind it.
Curves: RGB Free
A curve maps the brightness you see (left, black to white) to the brightness you get (bottom to top). The histogram of the channel is drawn behind it. Drag the two end points to set the black and white point; double-click to add a point in between and bend the curve, right-click a point to remove it. Light changes the brightness without shifting the colours; R, G and B act on each channel, to correct the colour of an object that is not neutral, like Mars. Settings files from older versions with Red and Blue are turned into R and B curves automatically.
Curves: Lab Free
As in the Lab mode of Photoshop: L is only the light, a and b only the colour (green–magenta and blue–yellow). Curve L to change the contrast without touching the colours; make a and b steeper to strengthen the colour. The Blur colour slider above softens the colour channels only: the colour noise goes away and not a single detail of the light is lost. The R, G and B curves, also shown in Lab mode, apply in both modes, so switching mode never changes the colour; the points of both modes are kept.
Reset channel / Reset curves Free
Puts the shown channel, or all the curves, back to a straight line.
Histogram and colour cast Free
The R, G and B histograms of the image as shown, with the letter of each channel over its peak. The scale is taken on the planet, not on the sky: the sky peak is clipped at the top, so the disk fills the height. Below, the average R G B of the sky with neutral or the colour cast, and the R/G and B/G ratios of the disk.
Final Touches
Pro
Three sliders in the colour column, between Contrast and Blur colour. They work for every target, planets, Moon and Sun, and in the Free edition they show the padlock and stay at zero. After saturation the order is: tint, midtones, contrast, sharpness; then, last of all, the smooth limb; normalisation, the highlight shoulder and the curves come after.
Tint Pro
Tint default: 0° Pro
Rotates all the colours around grey, from −180° to +180°: positive towards yellow and green, negative towards magenta. The brightness stays, only the hue turns. Next to the value Planet Engine writes, in words, the hue that the average colour of the subject takes with that rotation, so you can read it without judging the colour by eye.
Sharpness Pro
Sharpness default: 0 (off) Pro
Sharpness (general sharpening, in the colour column): a quick final touch of the fine detail over the whole image, from 0 to 200, after colour, tint and contrast and independent of the sharpening column (and of the zones of the Sun mode). It is a small-radius unsharp mask (1 px) on the brightness only: every pixel is scaled like its brightness, so no colour fringes are born. It never goes beyond the darkest and the brightest of the neighbouring pixels (within 2 px), so there are no bright rims, no dark halos and the white does not rise.
Smooth Limb Pro
Smooth limb default: 0 (off) Pro
Strong filters turn the edge of the disk into a saw-tooth (the Sun, but also Jupiter against the sky). Smooth limb, from 0 to 100, smooths it while the limb stays sharp; disk, sky and prominences do not change. It is the very last step, after Sharpness; it does nothing on the Surface target (the Moon).
Sun Mode
Pro
Choose Sun in Target (first column). The video is stacked like a surface; then the finishing gets the solar tools: sharpening by zone, a Sun group at the top of the colour column and a caption of its own. White balance is turned off by itself. Everything is live, like the other sliders, and works on whole disks and on close-ups where only part of the limb is in the field: the circle of the limb is fitted on the visible edge, leaving out prominences and spots on the edge.
The tools are applied in this order: disk halo removed from the stack; sharpening by zone; limb darkening; disk and prominence brightness; negative; false colour; colour by zone; saturation and midtones; then, as always, the final touches, normalisation, the highlight shoulder and the curves.
The Zones
Planet Engine splits the solar image into zones, with soft borders, measured on the stack as it arrives (so they do not move while you move the filters):
- Sky: what lies outside the disk, below the noise of the background.
- Prominences: the light outside the disk above the sky noise, attached to the limb. The glow around the limb, even when it is not round, is subtracted first, so it is not taken for prominences.
- Spots: dark, compact parts of the disk (umbra and penumbra), slightly widened to take the edge of the penumbra.
- Filaments: dark, thin structures on the disk, even when curved, outside the spots; also dark stubby pieces (detached tails, knots, short stretches) when they are dark enough, large enough and away from the plage.
- Plage (faculae): extended bright zones of the disk.
- Disc: the rest of the disk.
The zones inside the disk never overlap: spots first, then filaments, then plage, then the rest of the disk. Three thresholds, in the Sun group, decide how much darker or brighter than the surrounding disk a feature must be, in multiples of the noise: lower values find more (and more false ones).
Filament threshold default: 3, from 1 to 8
How much darker than the surrounding disk the filaments must be. Used by Adjust: Filaments and by their colour.
Spot threshold default: 6, from 2 to 15
How much darker than the surrounding disk the spots must be (umbra and penumbra, compact parts).
Plage threshold default: 3, from 1 to 8
How much brighter than the surrounding disk the plage must be (extended bright zones).
Show the zones default: off
Draws the zones over the finished image, to see whether they match while you move the thresholds. Zone opacity (0 = invisible, 100 = solid, 50 by default) sets how much the marks cover the image, and a check box for each zone chooses which to show. Every zone has a colour and a mark, written next to its name, so they can be told apart without seeing the colours: Sky · dots, Disc · dashed outline, Prominences · oblique lines, Filaments · solid, Spots · double outline, Plage · horizontal lines. Sky and disk are off at the start. On screen only: the zones never go into the saved images or the parameters.
Sharpening by Zone
Adjust: Disc / Prominences / Filaments / Plage / Spots
At the top of the sharpening column, under the presets. The sharpening sliders below (Wiener, deconvolution, detail, unsharp mask, noise and soften) apply to the chosen zone; switch zone and the sliders show that zone’s values, while the values of the zone you left are kept, its switched-off sliders too. A zone you never touch uses the same filters as the disk. The settings blend at the zone borders. The sharpening works on the linear stack, before the solar tools: on the faint prominences you can push the detail harder than on the bright disk, or calm the noise of the sky without softening the granulation.
The Sun Group
Disc halo default: 0 (off)
Many telescopes add a halo of scattered light around the disk, often stronger on one side. Planet Engine estimates it sector by sector (72 sectors of 5°) in a band just outside the limb, ignoring the prominences, and removes it from the stack before everything else: 0 = off, 100 = all the estimated halo removed, up to 200 = twice the estimated halo. Inside the disk, where it cannot be measured, it is extended moderately, so the veil near the edge goes without inventing a disk profile that cannot be seen.
Flatten sky background default: 0 (off) Pro
From 0 to 100: looks at the whole sky background, outside the disk and the prominences, and removes glow, gradients and haze at the frame edges, leaving the sky even (100 = an even sky); it never takes the sky below its own level.
Show sky imperfections default: off Pro
Instead of the image, shows the sky stretched very strongly, after the chosen flattening, with the disk in black: the glow, gradients and patches that are left stand out at once. On screen only.
Invert default: Off
Negative: channel by channel, the colour is inverted too. Brightness negative: only the brightness, the colour of the filter stays. Negative on the disc only: the disk in negative, the prominences outside the edge stay positive. With Colour by zone you can then give the sky (white in a negative) any colour, black included, without touching the prominences.
False colour default: None and Colour strength default: 100
Puts the brightness on a black → colour → white ramp, as with the filter: H-alpha, Calcium K or White light. For mono captures, or to change the colour. It is applied after the negative, so a negative can be coloured too. Colour strength goes from 0 (grey) to 100 (the whole ramp).
Disc brightness default: 0, from −3 to +3
The exposure of the disk, in stops: +1 doubles the light, −1 halves it.
Prominence brightness default: 0, from −2 to +6
The exposure of what lies outside the edge, in stops. The gain applies to the faint light and decreases smoothly to nothing at the light of the limb, so the faint prominences rise and join the limb without turning its edge into a burnt ring. With the disk brightness it works like two exposures of the same image.
Limb darkening default: 0 (off)
Compensates the darkening towards the edge of the disk, estimated from its average profile: 0 = off, 100 = a uniform disk. It is corrected on the linear light, before the brightness sliders.
Disc evenness default: 0 (off) Pro
Corrects the brighter or darker patches that an etalon leaves on the disk, while the limb darkening stays intact: 0 = off, 100 = even light.
Even out contrast default: 0 (off) Pro
Brings the contrast of the fine texture (fibrils, granulation) to the same level over the whole disk, where an etalon leaves it uneven; plage and filaments stay as they are: 0 = off, 100 = even contrast.
Colour by Zone
Zone Disc / Prominences / Filaments / Sky / Plage / Spots
The zone that the colour, hue, saturation and brightness below apply to. Each zone keeps its own values. The colour is applied on the final look, after negative and false colour: the sky colour changes only the sky, the prominences stay as they are, in the negative too.
Colour default: Original
Original: the colour that is there (false colour included), with adjustable saturation and brightness. Chosen tint: the hue below, with the light of the zone. Solid colour: the whole zone in one colour, for the sky; it works like a mask over the disk and the prominences: they stay untouched, like a layer on top, and the colour goes only on the sky, and it looks the same at every hue, in positive and in negative. A prominence fainter than the chosen colour stays as it is, so it can look darker than the background; to make it stand out, choose a darker sky or raise Prominence brightness. Black and white: no colour. Black, White: the zone filled. Under the menu, a row of ready colours, each with its name written on it (Black, White, Grey, H-alpha red, Orange, Yellow, Gold, Calcium violet, Blue, Light blue, Green): one click gives the chosen zone that colour as a preset tint: every pixel takes its hue and keeps its own brightness and saturation, so the colour is uniform and the prominences take the same tint as the disk.
Hue, Saturation, Brightness
Hue of the chosen tint, in degrees (0 red, 60 yellow, 120 green, 180 cyan, 240 blue, 300 magenta), shown with a small swatch and the name of the hue in words. Saturation of the zone, 0 to 200%: 100% = as it is (or the full tint), 0 = grey. Brightness of the zone, −100 to +100: −100 black, 0 as it is, +100 white. With the white sky of a negative, −100 brings it back to black.
A negative on a black sky. Invert: Negative on the disc only, or Brightness negative and then Zone: Sky, Colour: Black (or any other colour). The prominences are not part of the sky and keep their light.
Sun Caption
With the Sun target the Caption… button opens the Sun caption: the same window as for the planets (see Caption), with its own settings, because with the Sun the telescope, the camera and the filters usually change. The first time it starts as a copy of the planetary caption; after that the two are kept apart and each target remembers its own.
Presets
Pro
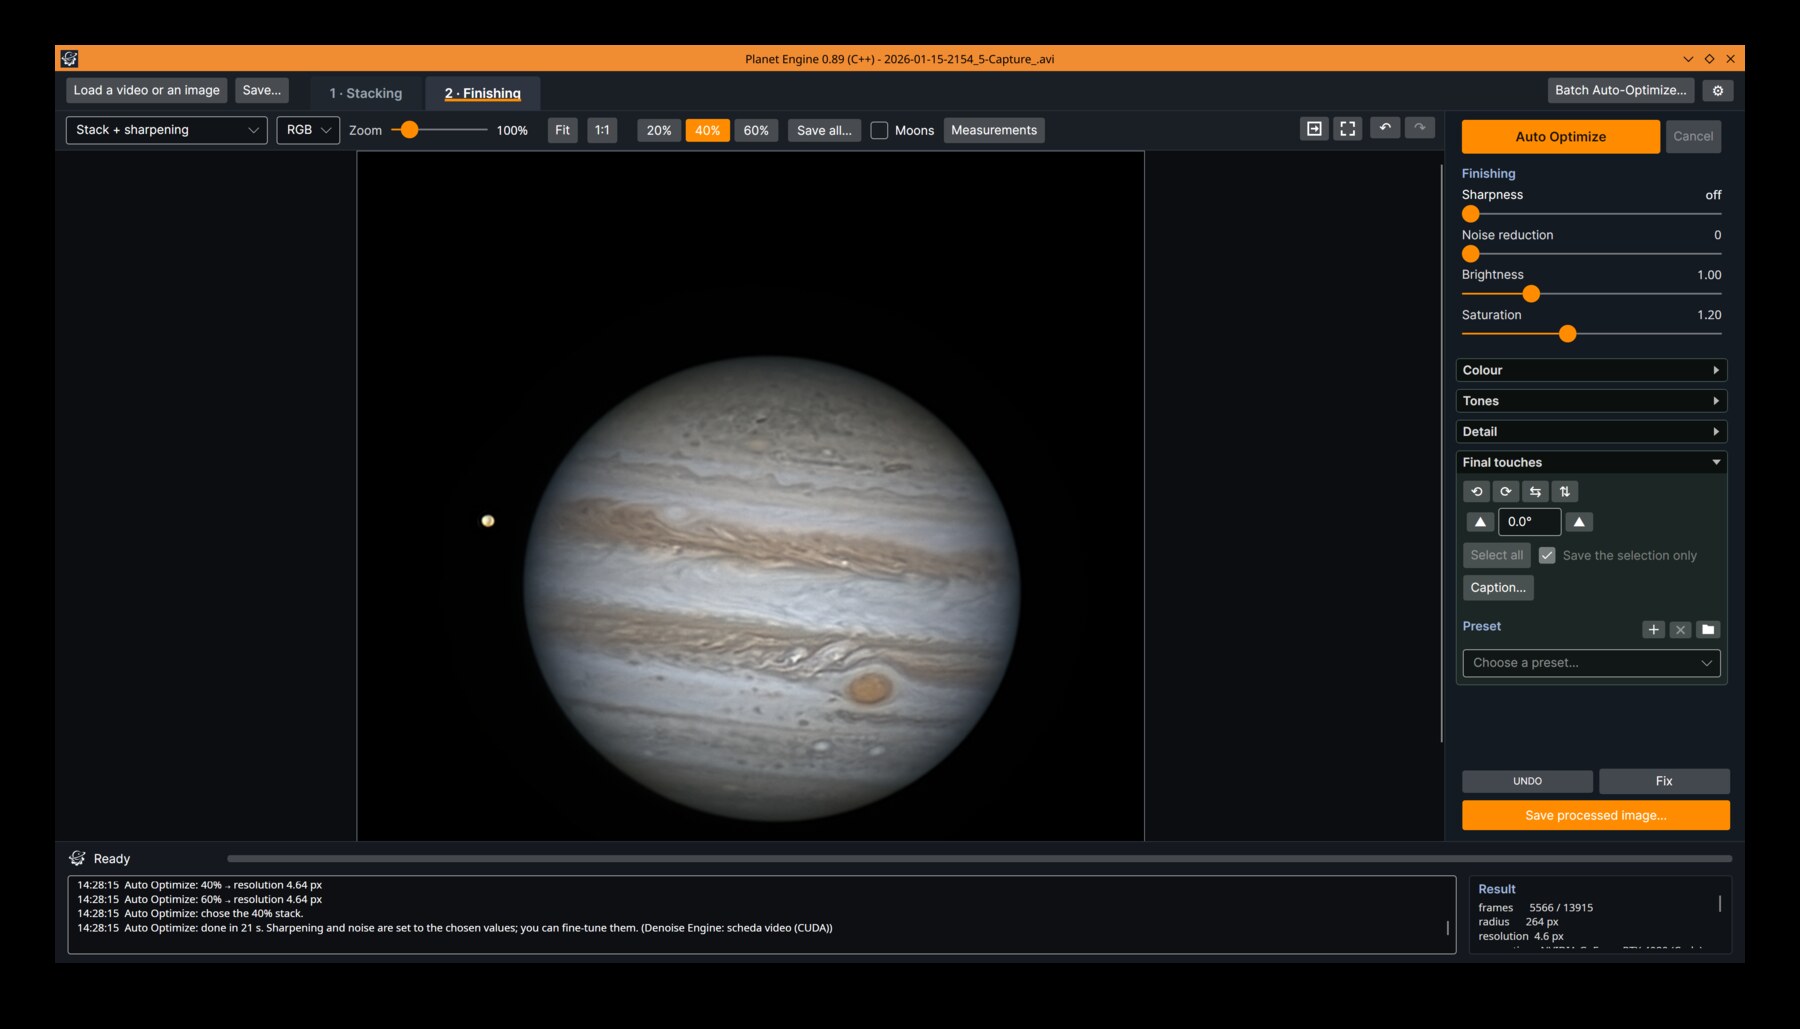
At the top of the sharpening column. The + button (Save as…) stores the current sharpening, colour and curves under a name; choose a preset from the menu and it is applied at once, so you can try several in a row on the same stack. The × button (Delete) removes the chosen one. When you save with the name of an existing preset, Planet Engine asks before replacing it. The folder button opens the presets folder: one file per preset, which you can copy, send to a friend or rename (the file name counts). Planet Engine ships with Registax L1 100 L2 20: the linear Registax recipe (layer 1 at 100, layer 2 at 20) translated into its sliders, measured scale by scale on a Jupiter; if you delete it, it does not come back. Presets work for every video; the stacking settings are not part of them, since changing those needs a new stacking (they go in Save parameters, which works in the Free edition too). In the Free edition the preset menu and its buttons are locked.
Measurements
Free
The Measurements button in the toolbar opens a floating panel that measures the finished image as you see it, on the disk without the limb:
- Fine detail, Structure and Grain, and the ratios Fine / grain and Structure / grain (higher is better): how much detail you get for each unit of grain.
- Edges: the sharpness of the edges.
- Colour: the disk averages R/G and B/G, and the saturation.
- A chart of the detail energy at each scale, from 1 to 32 px, for the image, its grain and the raw stack. Where the image curve comes down towards the grain curve, detail can no longer be told apart from noise.
Set as reference fixes the current image as the term of comparison; Load image… loads another one as the reference, for example a PNG from AutoStakkert or RegiStax. Every image you save adds a line to the list of trials; click a trial to make it the reference.
Saving
Free
At the bottom right of the window, between the log and the Result box: four buttons in two rows. Every save and load window opens in the folder of the opened video (or image). The suggested name for stack and image includes the number of stacked frames, for example NAME_2094f_stack.tif, so tests with different percentages do not overwrite each other.
- Save parameters: suggests NAME.tarastack next to the video (or the already stacked image), a small text file with every setting, curves included. Next to the video it is loaded automatically when you open it again; you can also save it elsewhere, for example on the desktop to send it to someone. If the file already exists, Planet Engine asks: Overwrite, Save new settings or Cancel. Save new settings keeps the previous file as NAME_001.tarastack, NAME_002… and saves the new one with the normal name, so opening the video always reloads the latest settings.
- Load parameters…: applies a saved file, for example an older numbered one, or a file from another video, to process a whole night of the same planet the same way. In the Free edition the values of the Pro features in a file are ignored (they stay off).
- Save stack…: the 16-bit TIFF of the linear result, white balance included but without sharpening, colour or curves, for processing in other programs. It is written uncompressed, so RegiStax 6 opens it too.
- Save image…: exactly what the viewer shows, sharpening, colour and curves included, as PNG, 16-bit TIFF or JPG (chosen in the save window), with the caption if it is on.
Caption
Free, with the Planet Engine logo Pro: logo optional
The Caption… button in the toolbar opens a window with a live preview of the finished image. With Add the caption to “Save image…” on, the saved image carries the capture data and the logos; the stack (Save stack…) never does. With the Sun target the window is the Sun caption, with settings of its own (see Sun mode).
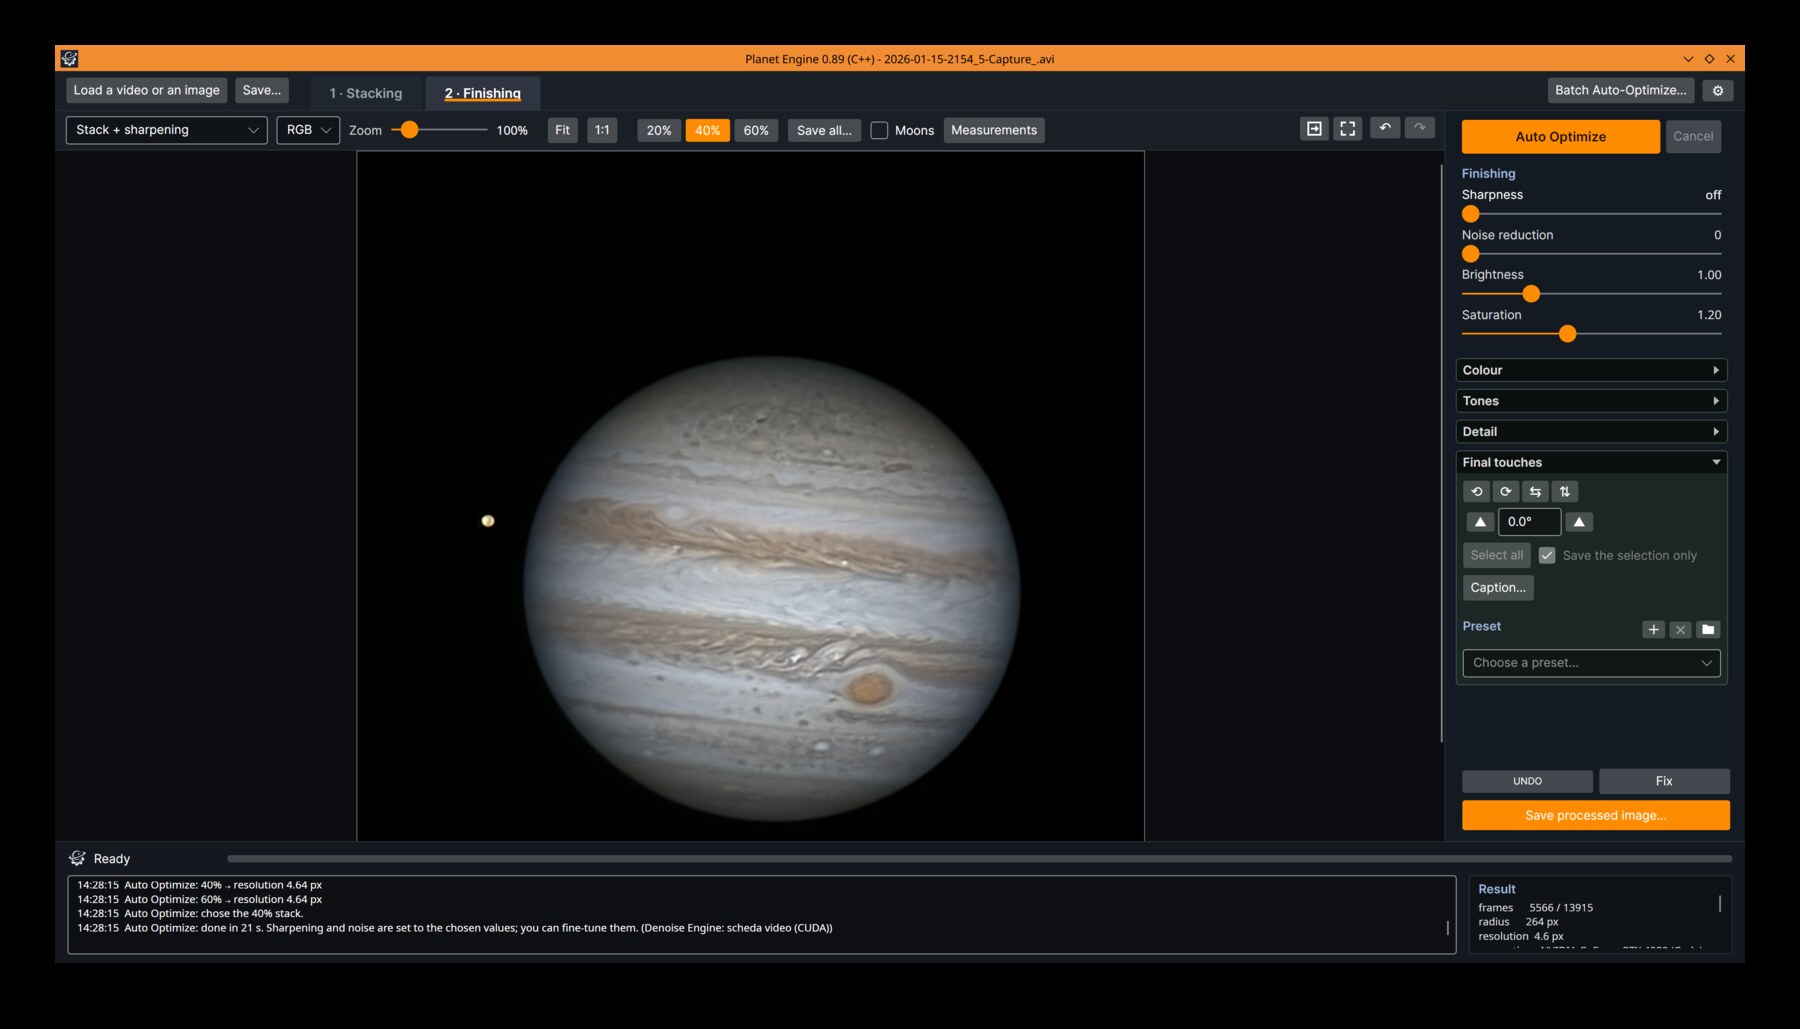
The caption window on a Saturn: object, date and time at the top left, CM III and logo at the top right, instrument, scale and frames at the bottom left, site and observer at the bottom right. Video by Cristian Fattinnanzi.
- Size: the canvas, Original (the size of the image), 960×540, 1280×720, 1920×1080 or custom. The image is never shrunk: if it does not fit, the canvas grows. Black band below adds a band under the image, in % of its height, where the text and logos of the bottom corners go: on the Moon they do not cover the craters.
- Text: In the corners, item by item (each item has an arrow button that moves it to the next corner at every click) or Free, the whole block dragged with the mouse in the preview. Font (any installed one), Text colour (a few named ones, or the #RRGGBB code) and Text size in % of the automatic one.
- What to write: object and date; UT time, the central instant of the frames used (from the SER timestamps, or from the file name plus the time to the centre); the central meridians, CM I, II and III for Jupiter and for Saturn, as in WinJUPOS (within 0.1° of WinJUPOS); telescope, camera and filter; imaging focal length and scale in ″/px; stacked frames out of the valid ones; the notes; observer and site.
- Observer and site stay together, in their corner or dragged with the mouse in the preview (grabbed on the name they move on their own, the rest of the text stays put). Name above the site chooses the order; off, the name comes last, like a signature.
- Details (written once): the object, if the file name does not already say which planet it is; observer, telescope, camera (empty = the one written in the SER), filter, notes and site. Time in the file name: the hours to add if the camera writes local time (-2 for Central European summer time, -1 for winter time). Frames (typed in): for images already processed elsewhere, where Planet Engine does not know them.
- Logos: the Planet Engine logo and yours (a PNG, with its height in % of the canvas), in the same corner, chosen with the arrow next to Planet Engine logo. The text in the same corner moves aside to make room. Free the Planet Engine logo goes on every saved image (PNG, JPG, TIFF), even without the caption, in the corner chosen here; never on a FITS. Pro untick it to leave only your logo, or none.
The ⚙ Menu: Computing, Telescope, Shortcuts, Licence
Free Pro: graphics card, preset at start-up
The ⚙ button at the top right of the window opens a small panel. Every choice is remembered.
Language and Interface colour Free
The language of the whole program and the accent colour; see First steps and Tips.
At start-up default: Defaults Free Pro: a preset
The settings the program starts with: Defaults, Filters at zero, or (Pro) one of your presets. Parameters saved with a video always take precedence.
Sensor pixel (µm) and Aperture (mm) default: 0 (not set) Free
The data of your telescope. With them, the Result box adds the focal length and focal ratio and the sampling in pixels per λ/D, with a judgement (undersampled, a bit low, right, oversampled) that takes into account whether the camera is colour or mono. The pixel size is used only when the camera is not written in the SER: for ZWO, QHY, Player One, ToupTek and SVBony cameras and Sony IMX sensors it is read from the file. For Jupiter, Saturn and Mars the box always shows the scale in arcseconds per pixel, from the measured size of the disk and the distance of the planet on the night of the video (from the SER time stamps, the file name or the file date), and the measured resolution in arcseconds and in λ/D.
Computing default: Automatic Free: processor Pro: graphics card
Where the heavy part of stacking runs. Automatic uses the graphics card if there is a suitable one (NVIDIA with CUDA, or Intel and AMD with OpenCL), otherwise the processor; Graphics card and Processor force the choice. In the Free edition the menu stays on Processor; your choice is kept for when Pro is active. On Windows 7 graphics card computing is not guaranteed. The result is the same, within a few hundredths of a percent; the Result box says which was used (for example GeForce RTX 3050 Ti Laptop GPU (Cuda)). If the card fails, stacking is redone on the processor by itself; the log says which card and why, and the full detail goes to %AppData%\Planet Engine\errore-scheda.txt, to send with the report. Measured: a 3-minute Jupiter video, 51 s on a Ryzen 9 9950X and 22 s with an RTX 4080; an 8000-frame Jupiter video on the whole frame, 357 s on a laptop Ryzen 7 5700U and 135 s with its RTX 3050 Ti. The frame analysis and the reading of the video still run on the processor: keep the videos on a fast internal disk, since a slow external disk can take as long as the stacking.
Keyboard shortcuts… Free
The list of commands with their key: open a video (Ctrl+O), undo (Ctrl+Z), redo (Ctrl+Y), remove the preview box (Esc), switch the last touched slider off or on (W). Click a command’s key, then press the new one (Ctrl, Shift or Alt allowed); Del removes it. If the key belonged to another command, that one is left without and the window says so. Defaults brings back the original keys.
License…
Opens the Planet Engine license window: the edition in use, Pro activation and the 7-day trial. See Licence.
About Planet Engine
Version, credits and the people who support Planet Engine.
Licence: Free, Pro and the Trial
Planet Engine starts in the Free edition. The licence window (Planet Engine license) opens by itself only the very first time; after that you find it in ⚙ → License…, and it also opens when you click a Pro padlock (it then says which feature you clicked). At the top it shows the version and the current state, for example Free version, Pro trial: 5 days left or Pro, licensed to …. In the Free edition and during the trial it offers three ways (from the next version, once a bought Pro is active, the window shows only its state, without the e-mail box and Buy Pro…):
Try Pro free for 15 days. Press Try Pro for 15 days in the licence window: every Pro feature for 15 days on this computer. No e-mail is needed (the server only gets an anonymous code of the computer), nothing to buy, and when the trial ends Planet Engine goes back to Free by itself. Only activating a Pro you bought asks for your e-mail.
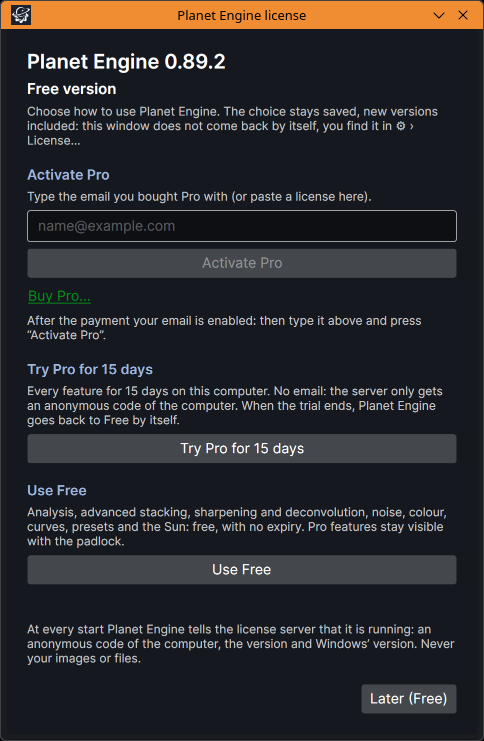
The Planet Engine license window at the first start.
Activate Pro Pro
Type the e-mail address you bought Pro with and press Activate Pro (or Enter). Planet Engine asks the licence server for the licence linked to that address and installs it at once: Pro version active: every feature is unlocked. After a purchase, Renato enables your e-mail on the server; then you type it here. If the computer has no connection, you can paste a licence text into the same box instead of the e-mail. If the address has no licence, the window says so: check the spelling, or use the address you bought Pro with. The purchase of Pro will be available soon (Coming soon).
Try Pro free for 15 days Pro trial
The button Try Pro for 15 days: every feature, free, for 15 days on this computer. No e-mail is needed: the server only receives an anonymous code of the computer. The days left are shown in the window. When the trial ends Planet Engine goes back to Free by itself and says so in the log; the trial can be used once per computer, and the button is offered only if you have no licence and have not used it there yet.
Use Free Free
Analysis, advanced stacking, sharpening, noise, colour, curves and caption: free, with no expiry. Every saved image (PNG, JPG, TIFF) carries the Planet Engine logo, also without a caption; a FITS never does. The Pro features stay in view with the padlock. The first time, closing the window without choosing (Later (Free)) also means Free. The choice is kept with new versions too.
At every start Planet Engine tells the licence server that it is running: an anonymous code of the computer, the version of Planet Engine and that of Windows. Never your images or your files. If the server cannot be reached, nothing changes at start; activation and the trial need the connection (check a firewall that may block PlanetEngine.exe).
| Feature | Free | Pro |
|---|
| Frame-quality analysis and frame selection | Yes | Yes |
| Planet Engine’s advanced stacking, local selection, stack upscaling | Yes | Yes |
| Multiscale sharpening (detail sliders), unsharp mask, noise reduction, soften, limb protection | Yes | Yes |
| Saturation, midtones, contrast, normalise, blur colour, RGB and Lab curves | Yes | Yes |
| Save 16-bit TIFF and PNG (and JPG), save and load parameters | Yes | Yes |
| Automatic caption | Yes, with the Planet Engine logo | Yes, logo optional |
| Planet Engine logo on every saved image (PNG, JPG, TIFF; never on FITS) | Yes | No |
| Best frame view and Moons switch | Yes | Yes |
| Sun mode: zones, filters and colours by zone, negative, limb darkening, disk halo, zones overlay | No | Yes |
| Deconvolution and Wiener | No | Yes |
| Computing on the graphics card | No (processor) | Yes |
| Fast multistack | No | Yes |
| Derotation | No | Yes |
| Smooth limb, Sharpness (general sharpening), Tint | No | Yes |
| Align RGB channels while stacking | Yes | Yes |
| Align RGB channels button for already stacked images, moons aligned one by one | No | Yes |
| Presets (and a preset at start-up) | No | Yes |
In the Free edition the Pro values are never applied, not even when they come from a parameters file or a preset made with Pro: those sliders go back to zero and those boxes off.
Tips
- Experiment freely. Ctrl+Z undoes any change to the settings, Ctrl+Y redoes it.
- How many frames? A Multistack (Pro) with 3 or 4 percentages costs about one stacking and answers at once; then keep the best percentage for that night. In Free, stack twice with different Frames to stack and compare with Measurements.
- How much does a filter do? A click on its knob, or W, switches it off and on.
- Judge at 1:1. At large zoom every stack looks soft, at small zoom every sharpening looks good.
- Long videos of Jupiter: the planet rotates. Try Derotation (Pro); otherwise use one or two minutes at a time (From/To frame) and derotate the results with your usual tools.
- The Moon and the Sun: if Automatic takes a crescent for a planet, choose Surface, or Sun for the solar tools (Pro). Protect the limb does not apply.
- The planet is not found: check in the Original video view that the disk is drawn in green; a red circle means it touches the edge of the frame in that frame.
- Language: English, Italiano, Deutsch, Français, Español, Português. The interface follows Windows; change it with the ⚙ button at the top right of the window, together with the interface colour. The window remembers its size and place.
What Happens Inside
- Analysis: every frame gets a quality score.
- Stacking: the best frames are combined with Planet Engine’s advanced stacking, on the processor or (Pro) on the graphics card.
- Finishing: sharpening, colour and curves are applied live to what you see; in Sun mode the solar tools too.
Thanks
Planet Engine grew out of the ideas of three astrophotographers: Renato Tarabella, Cristian Fattinnanzi and Paolo Baldoni. Cristian and Paolo ran it against AutoStakkert, RegiStax and AstroSurface on their own videos, and asked, rightly, for many of the features described in this manual; the Sun mode was built on Paolo’s solar videos and requests. Thanks also to everyone who reports bugs and ideas on Discord.